As you know, we’ve recently renovated the Postcron platform to give you a better user experience. Along with the new features, there are others that have become classics of our site, like the ability to establish Predefined Publishing Times.
That’s exactly what we’re going to discuss in this post! Today, I’ll show you how to set up your Predefined Publishing Times step by step, so you can start scheduling your content to be published during these times, with just the push of a button. Here we go!
Why should you establish Predefined Publishing Times?
First of all, I want to tell you about why it is useful to set up your your Predefined Publishing Times. The main reason is that it is extremely handy as it helps you determine in advance what time on each day of the week your posts will be shared, for each of your social accounts.
That way, once you have established your Predefined Publishing Times, all you have to do is upload your content in Post Editor and select the “Predefined Publishing Times” option. Then your posts will be automatically scheduled during those specific times, made quick and easy for you.
Now that you understand the usefulness of this feature, let’s move on to the tutorial!
How to set up Predefined Publishing Times on Postcron
1- The first thing you have to do is go to Postcron and login to your account via the Social Network of your choice.
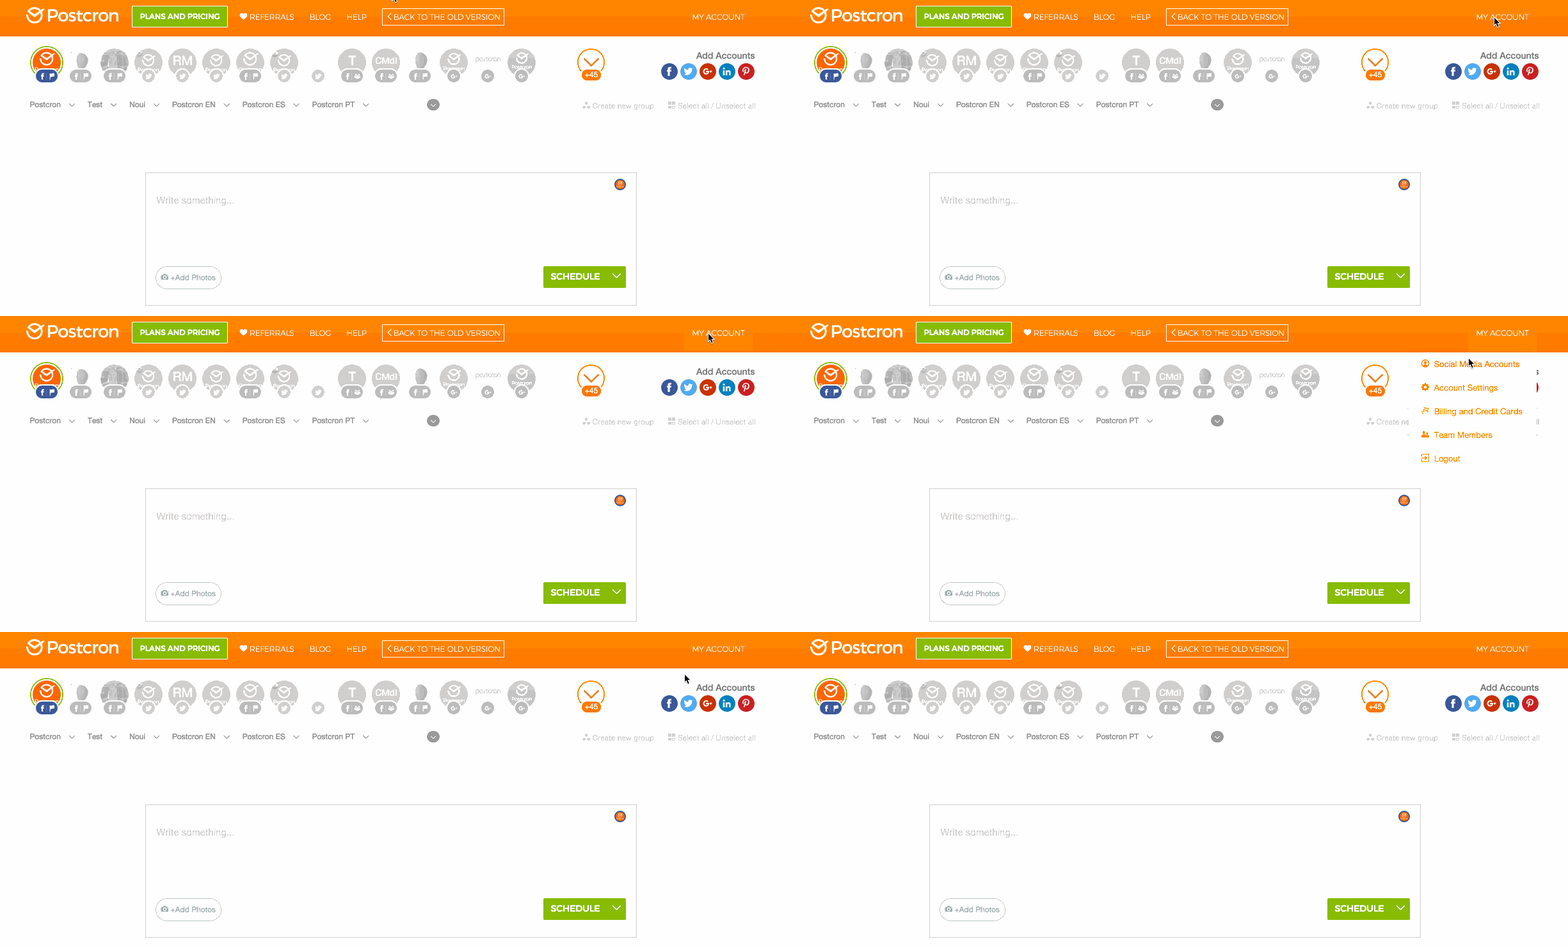
2- Once on the Dashboard, click on the “My Account” menu on the top right of the page. When it displays the drop down menu, click on “Social Media Accounts” as you can see below.
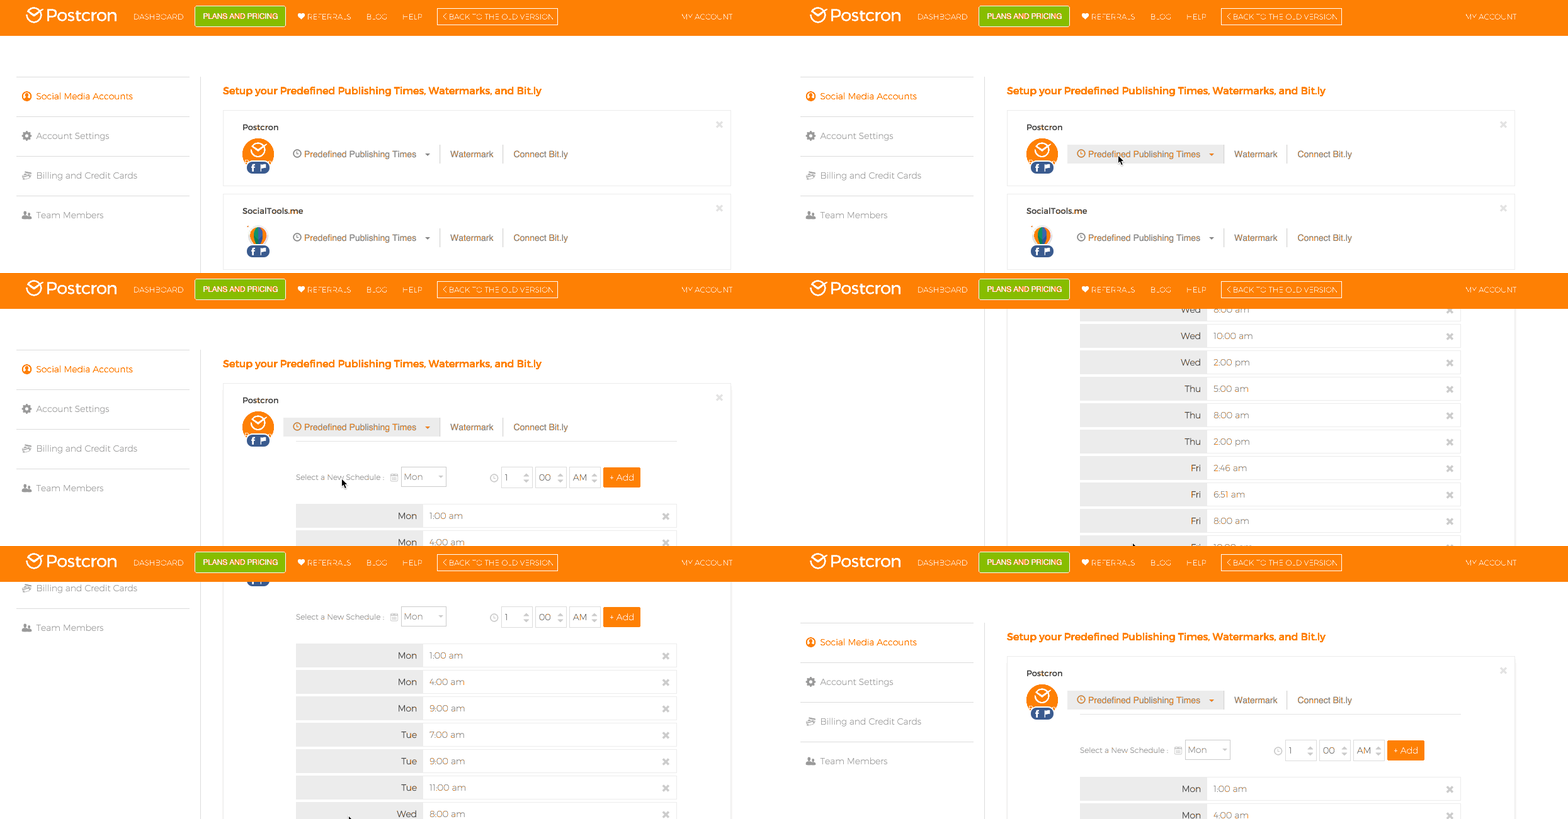
3- After choosing this option, “Set up your Predefined Publishing Times, Watermarks, and Bit.ly” sections will appear. Click on the “Predefined Publishing Times” button for the account where you want to set them up. A weekly schedule will appear so you can start editing them as seen in the GIF below:
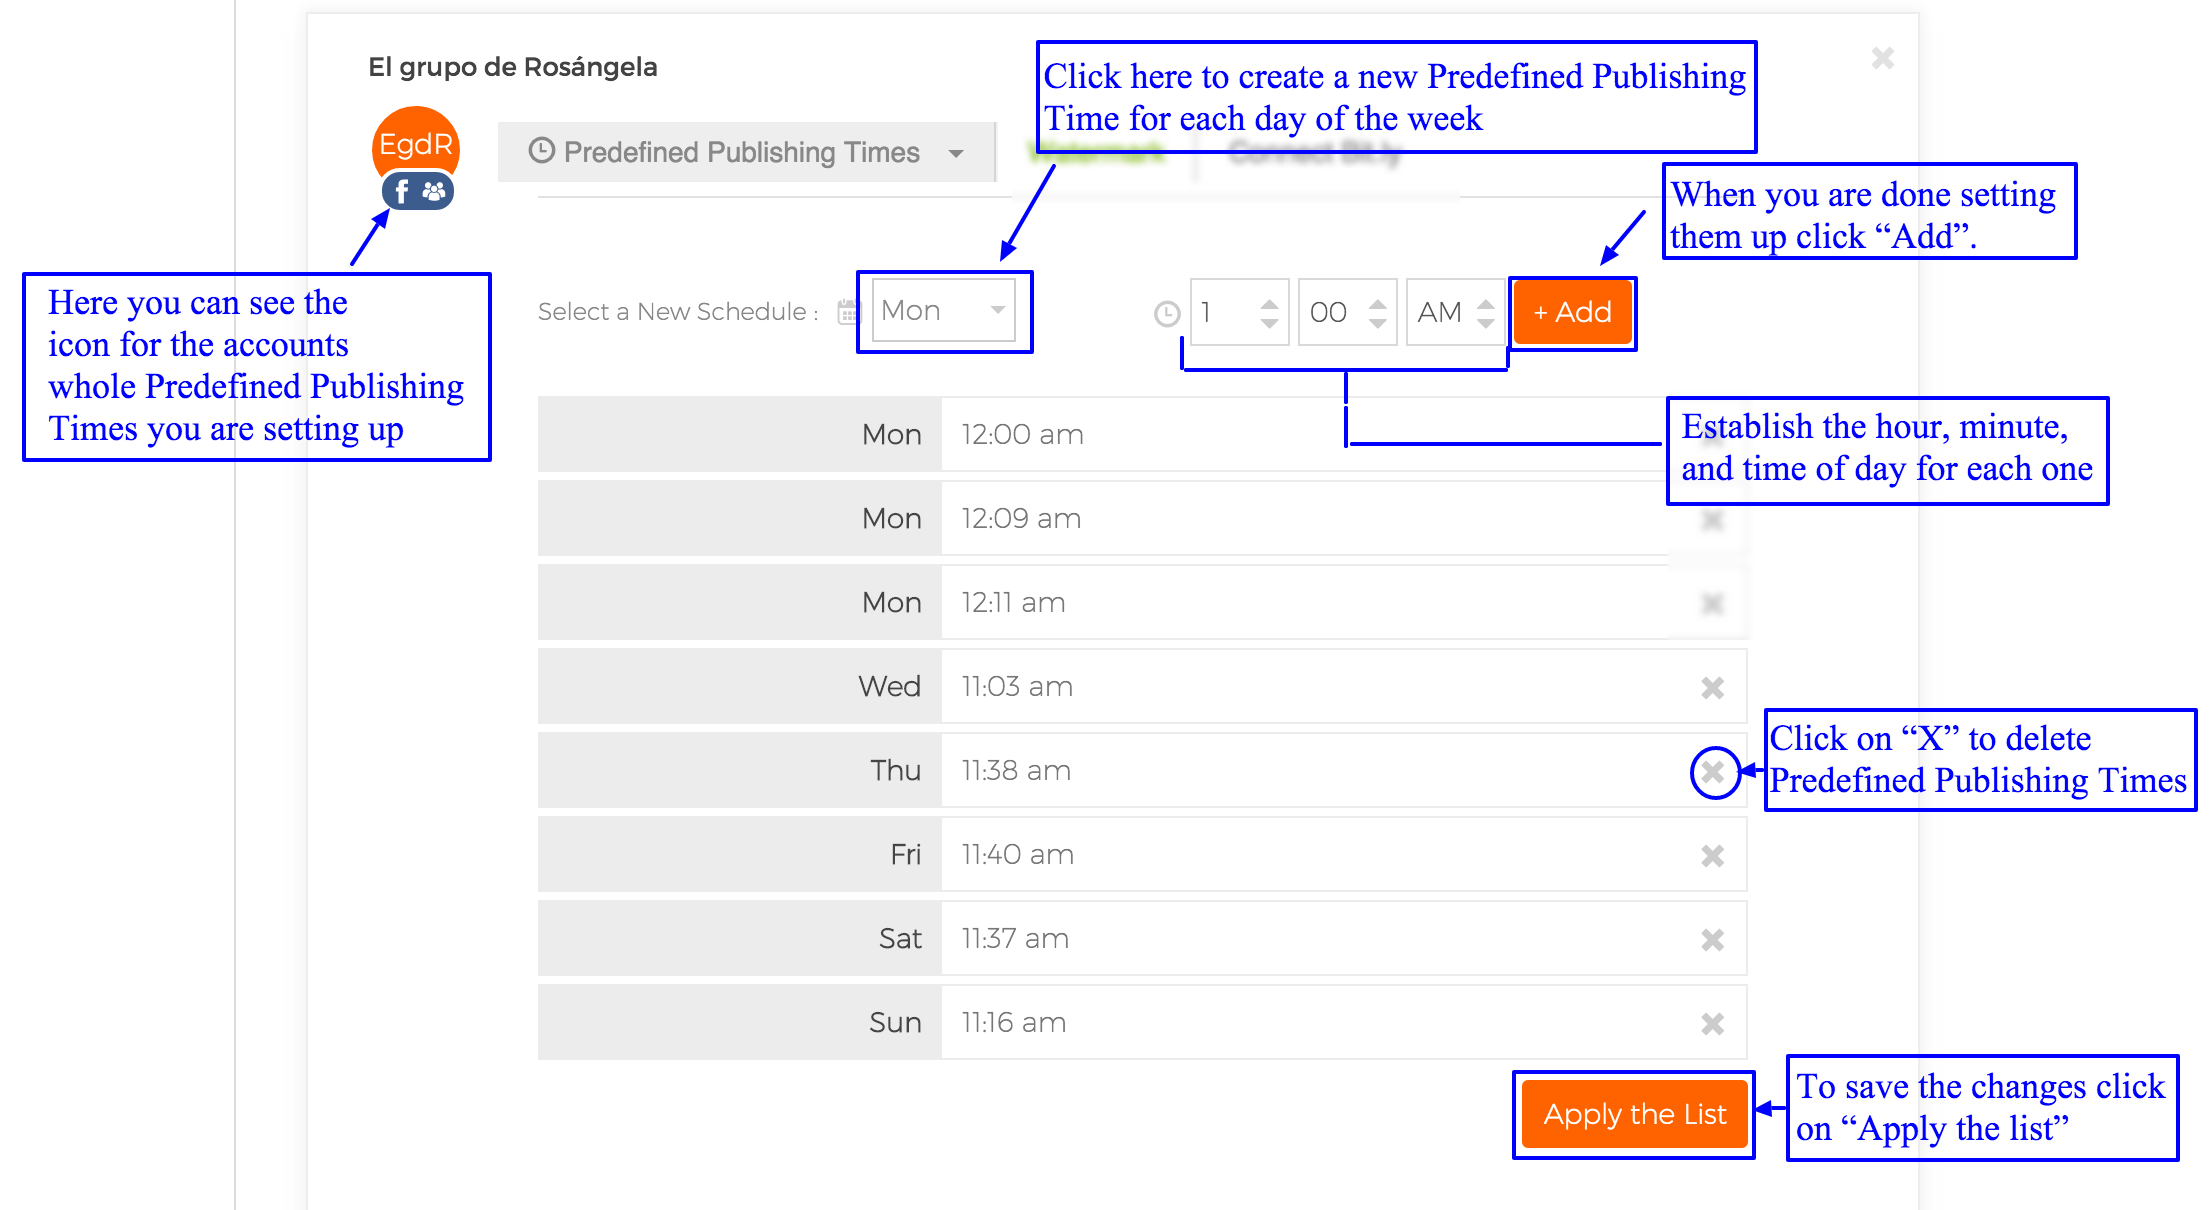
4- Now it’s time to set up your Predefined Publishing Times. To do this you can edit the days, hours, and minutes to the exact time you want content to be shared for each account. During the setup process you can delete the times that aren’t useful or create all the ones that are. To save each change click “Add” and to finish setting up your Predefined Publishing Times, click “Apply the list“.
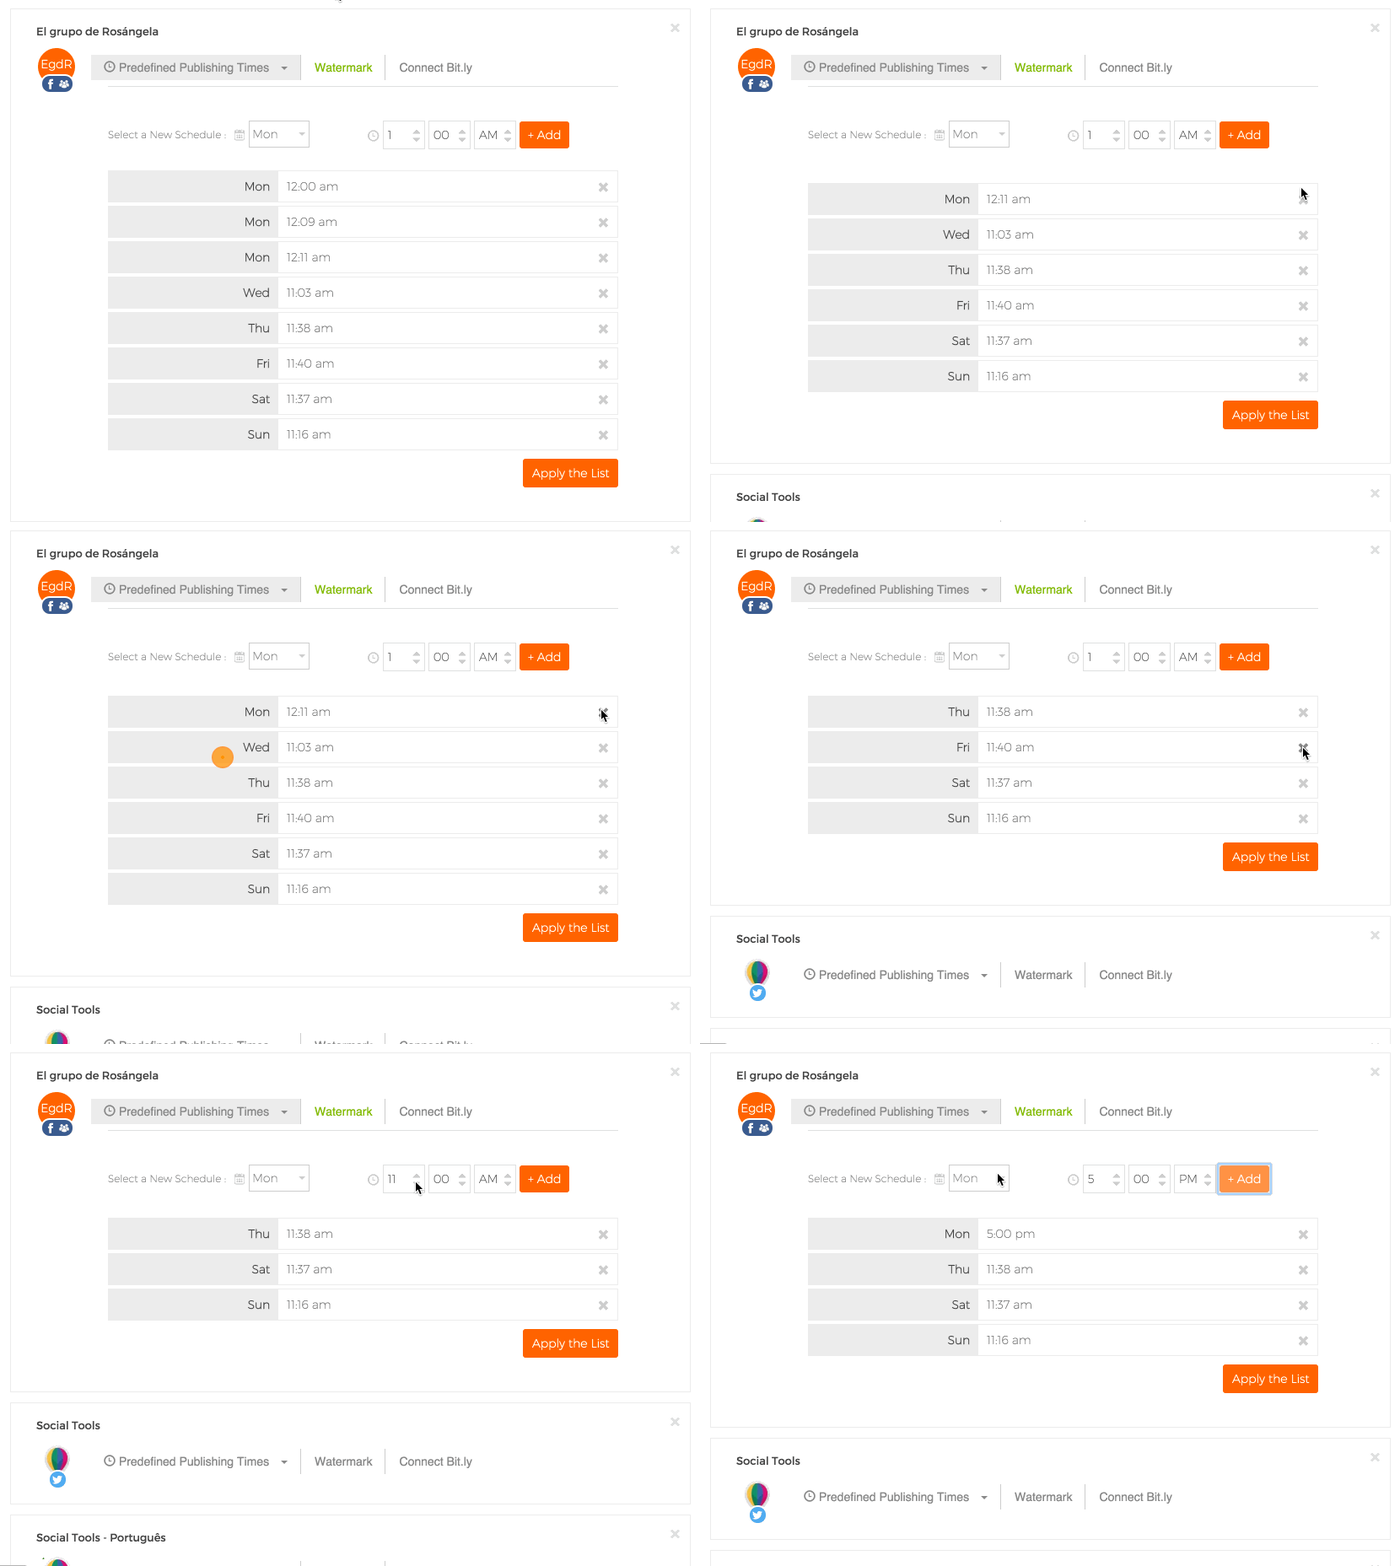
Below you can see an example of setting up Predefined Publishing Times. Mondays, Wednesdays, and Fridays are being deleted in order to change the publishing time for each of those days. Then Mondays and Wednesdays are added with the time 5:00 PM; and Fridays at 12:00 PM. Easy, right?!
5- Now you are ready to start scheduling posts in your Predefined Publishing Times!
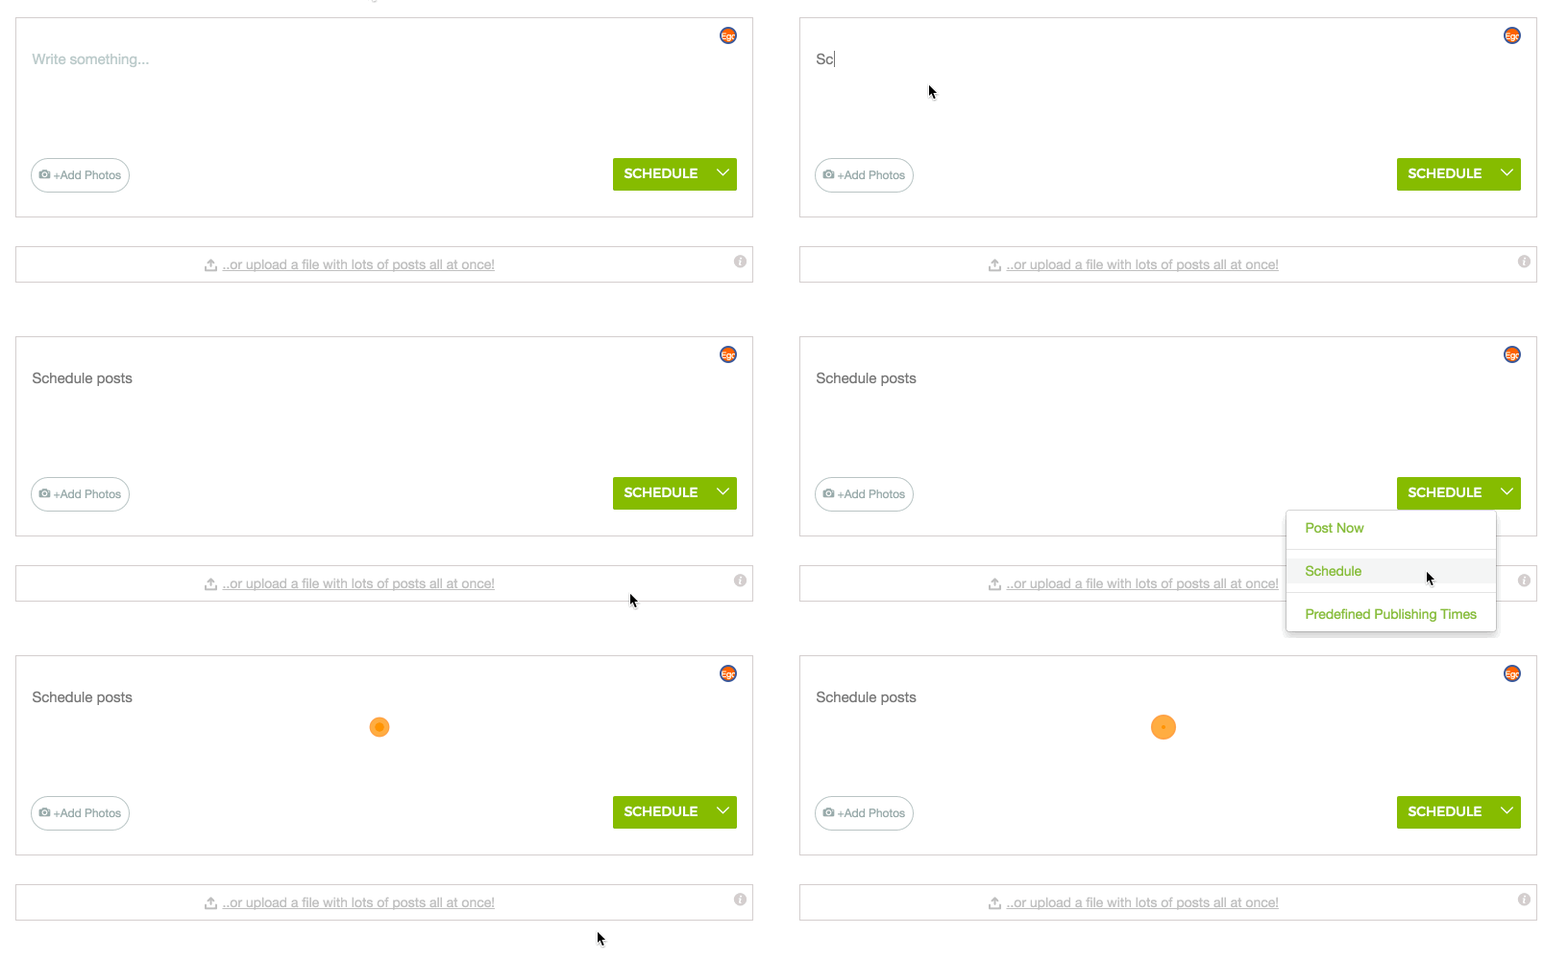
To implement them, go to the Post Editor, select the account(s) where you want to publish, and upload your content. Finally, press the green button “Schedule” and click on the “Predefined Publishing Times” option. That’s it! 🙂
Here’s an example of using Predefined Publishing Times “in action“:
I hope this tutorial has been helpful for learning how to set up your own Predefined Publishing Times. Let me know what you thought!
Did you find this article helpful? Did you already know about this Postcron feature? Tell us about your experiences with it! And please remember to share this blog post with all your contacts that you think can benefit from it? Until next time! 😉
